# Create User

This document provides instructions to create user in the ***Social Registry*** module.

## Prerequisites

* The user must have access to the Social Registry module.
* The user must have Registrar and Administrator role.

## Procedure

1. Click the main menu icon ![](https://1895884874-files.gitbook.io/~/files/v0/b/gitbook-x-prod.appspot.com/o/spaces%2FnKdOHLbjDdIln1QDNwSx%2Fuploads%2Fgit-blob-1b48611b7e3fc05b72b589735073c90404ac05ef%2Fmain-menu.png?alt=media) and select ***Settings***.

<figure><img src="https://1895884874-files.gitbook.io/~/files/v0/b/gitbook-x-prod.appspot.com/o/spaces%2FnKdOHLbjDdIln1QDNwSx%2Fuploads%2Fgit-blob-56ae19ae7e16c9d3ba54cfed696a0d59f3cc0adb%2Fmenu-settings.png?alt=media" alt=""><figcaption></figcaption></figure>

The ***Settings*** screen is displayed.

<figure><img src="https://1895884874-files.gitbook.io/~/files/v0/b/gitbook-x-prod.appspot.com/o/spaces%2FnKdOHLbjDdIln1QDNwSx%2Fuploads%2Fgit-blob-49e33b73e7c9d0c22ffdfe59b468f7d937cb64ef%2Fsettings-screen.png?alt=media" alt=""><figcaption></figcaption></figure>

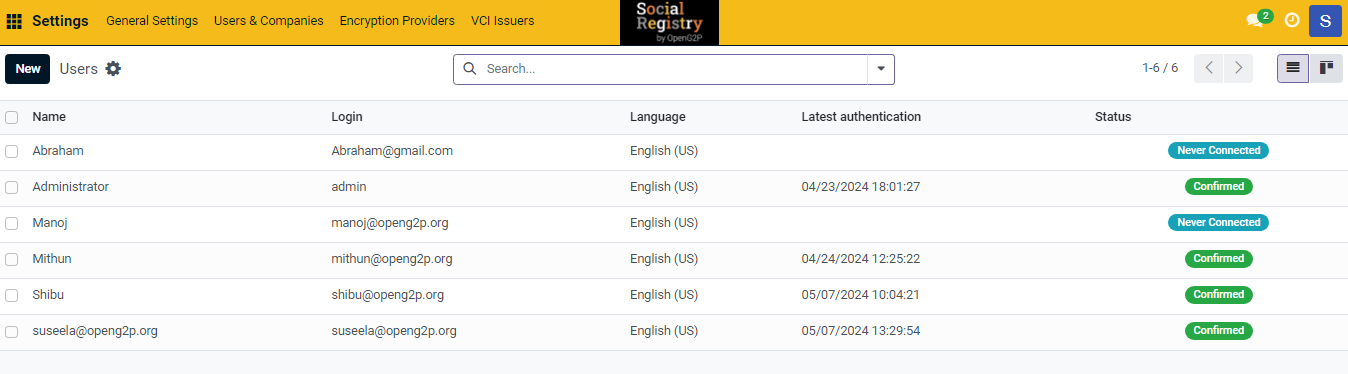
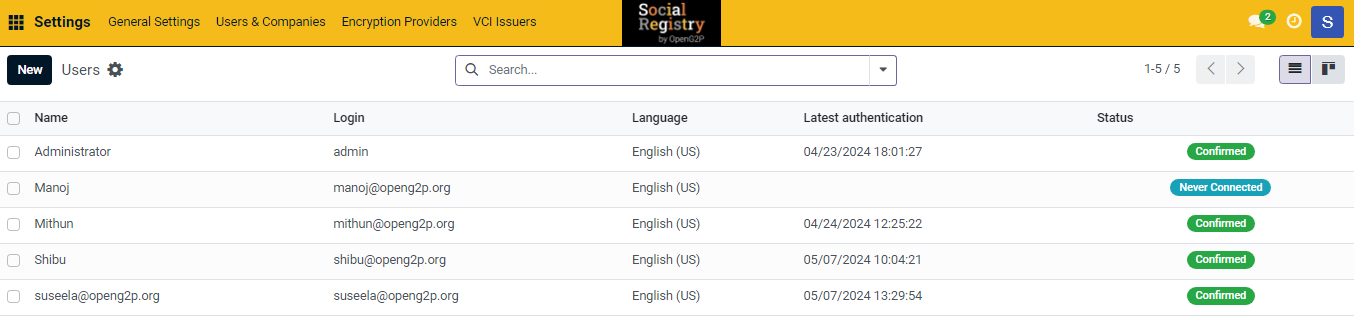
2. In the menu bar, click the ***Users & Companies*** and then select Users.

<figure><img src="https://1895884874-files.gitbook.io/~/files/v0/b/gitbook-x-prod.appspot.com/o/spaces%2FnKdOHLbjDdIln1QDNwSx%2Fuploads%2Fgit-blob-c5a568a401ceab09f12bd0501e2c620e1df8f7bf%2Fusers-companies-social-registry.png?alt=media" alt=""><figcaption></figcaption></figure>

***Users*** screen is displayed. It is a dashboard which lists the details of all the available Users Name, Login, Language, Latest authentication and their status.

<figure><img src="https://1895884874-files.gitbook.io/~/files/v0/b/gitbook-x-prod.appspot.com/o/spaces%2FnKdOHLbjDdIln1QDNwSx%2Fuploads%2Fgit-blob-921cfc567205fa44cbedaf05360a3f7b45fbe876%2Fusers-screen-sr.png?alt=media" alt=""><figcaption></figcaption></figure>

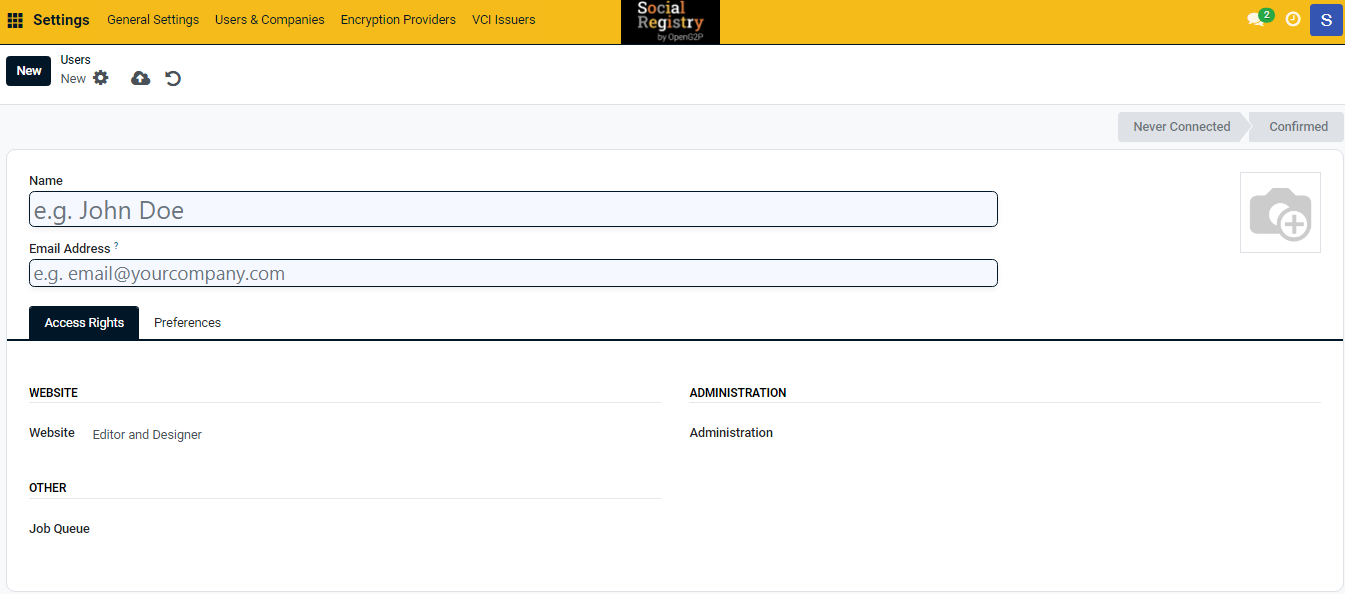
3. Click the ***New*** button.

***User New*** screen is displayed.

<figure><img src="https://1895884874-files.gitbook.io/~/files/v0/b/gitbook-x-prod.appspot.com/o/spaces%2FnKdOHLbjDdIln1QDNwSx%2Fuploads%2Fgit-blob-48e9a72cb7a3108513c31aa503eb5c1fb2164810%2Fusers-new-screen-sr.png?alt=media" alt=""><figcaption></figcaption></figure>

In ***Users New*** screen, the available features and their descriptions are:

<table><thead><tr><th width="166">Feature</th><th>Description</th></tr></thead><tbody><tr><td>Name</td><td>Enter the new user name</td></tr><tr><td>Email Address</td><td>Enter the valid email Id. of the user. The invitation email will be sent to this email address.</td></tr><tr><td><img src="https://1895884874-files.gitbook.io/~/files/v0/b/gitbook-x-prod.appspot.com/o/spaces%2FnKdOHLbjDdIln1QDNwSx%2Fuploads%2Fgit-blob-b9785c3e12d920c7b5b0ad3a96e895f64013ef58%2Fphoto-camera-icon.png?alt=media" alt="" data-size="original"></td><td><ul><li>Select the icon, click the edit icon and then navigate to the user photo where it is stored</li><li>Export the user photo</li><li>Click the delete icon to delete the user photo</li></ul></td></tr></tbody></table>

4. Click the ***Access Rights*** tab.

The fields and their descriptions are given below:

| Field          | Description                                                                                                                                                                                                                                                                                                                                 |
| -------------- | ------------------------------------------------------------------------------------------------------------------------------------------------------------------------------------------------------------------------------------------------------------------------------------------------------------------------------------------- |
| Accounting     | <p><em><strong>Invoicing</strong></em></p><p>Select the appropriate value from the drop-down. The available values are</p><ul><li>Billing</li><li>Billing Administrator</li></ul><p><em><strong>Bank</strong></em></p><p>Select the appropriate value from the drop-down, The available value is</p><ul><li>Validate bank account</li></ul> |
| Website        | <p>Select the appropriate value from the drop-down. The available values are</p><ul><li>Restricted Editor</li><li>Editor and Designer</li></ul>                                                                                                                                                                                             |
| Administration | <p>Select the appropriate value from the drop-down. The available values are</p><ul><li>Access Rights</li><li>Settings</li></ul>                                                                                                                                                                                                            |
| Other          | <p><em><strong>Job Queue</strong></em></p><p>Select the appropriate value from the drop-down. The available value is</p><ul><li>Job Queue Manager</li></ul><p><em><strong>Dashboard</strong></em></p><p>Select the appropriate value from the drop-down. The available value is</p><ul><li>Admin</li></ul>                                  |

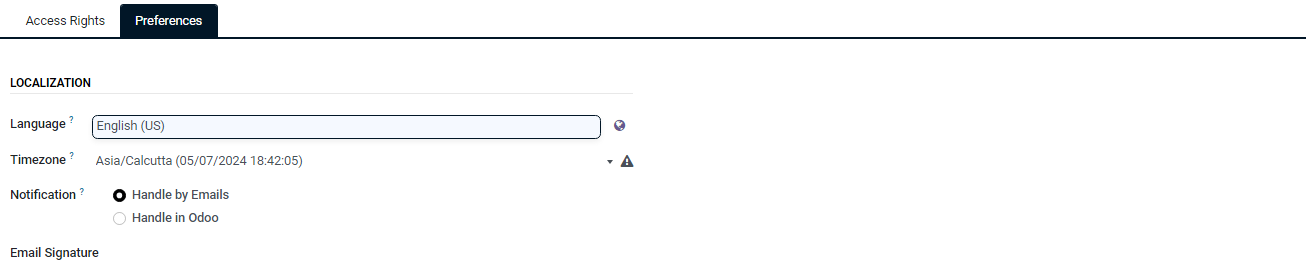
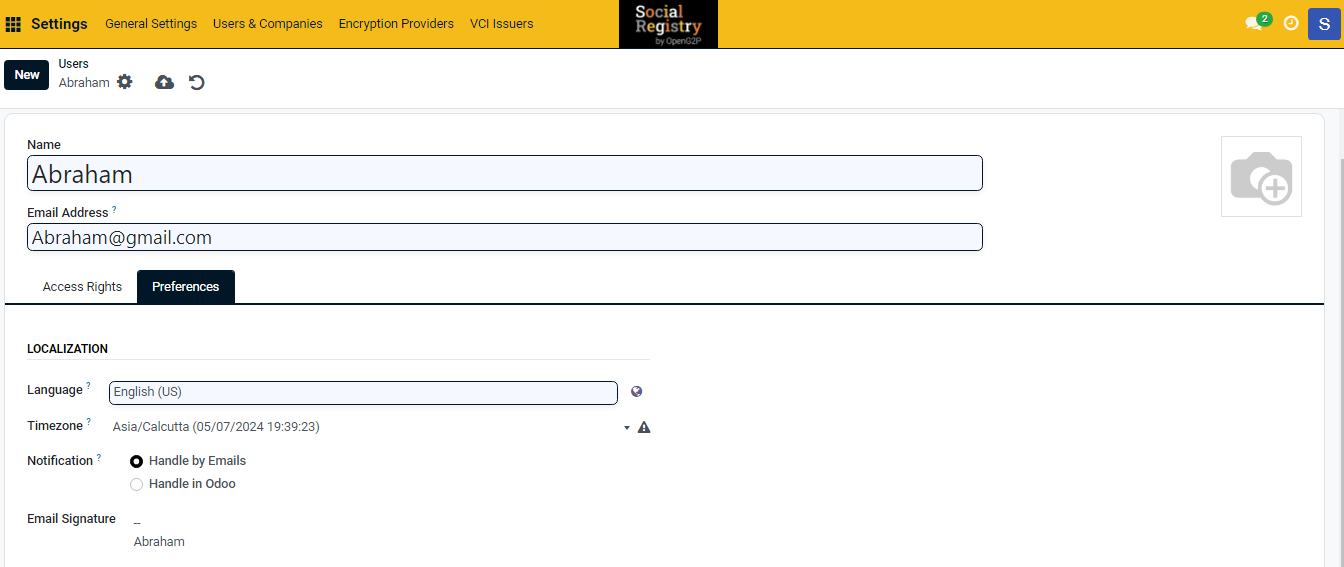
5. Click the ***Preferences*** tab.

<figure><img src="https://1895884874-files.gitbook.io/~/files/v0/b/gitbook-x-prod.appspot.com/o/spaces%2FnKdOHLbjDdIln1QDNwSx%2Fuploads%2Fgit-blob-406cb472d406c6c608c266c47921777c513f855e%2Fuser-preference-sr.png?alt=media" alt=""><figcaption></figcaption></figure>

The fields and their descriptions are given below:

| Field           | Description                                                                                                          |
| --------------- | -------------------------------------------------------------------------------------------------------------------- |
| Language        | Select the preferred language from the drop-down.                                                                    |
| Timezone        | Select the timezone from the drop-down list.                                                                         |
| Notification    | <p>Select the appropriate radio button. The values are:</p><ul><li>Handle by Emails</li><li>Handle in Odoo</li></ul> |
| Email Signature | Enter the valid Email ID.                                                                                            |

<figure><img src="https://1895884874-files.gitbook.io/~/files/v0/b/gitbook-x-prod.appspot.com/o/spaces%2FnKdOHLbjDdIln1QDNwSx%2Fuploads%2Fgit-blob-62da35adf17e2e906b9b6495a1aae3747c082dac%2Fuser-new-filled-screen-sr.png?alt=media" alt=""><figcaption></figcaption></figure>

6. Click the ***Oauth*** tab.

<figure><img src="https://1895884874-files.gitbook.io/~/files/v0/b/gitbook-x-prod.appspot.com/o/spaces%2FnKdOHLbjDdIln1QDNwSx%2Fuploads%2Fgit-blob-d6b42196d69bc9f2592a322c46dd4dcdd99f3f45%2Foauth-tab-sr.png?alt=media" alt=""><figcaption></figcaption></figure>

The fields and their descriptions are given below:

| Field              | Description                                                                                                                                                                   |
| ------------------ | ----------------------------------------------------------------------------------------------------------------------------------------------------------------------------- |
| OAuth Provider     | <ul><li>Select the appropriate value from the drop-down.</li></ul><p>(or)</p><ul><li>Search for the OAuth Provider using the Search more option from the drop-down.</li></ul> |
| OAuth User ID      | Enter the OAuth user ID.                                                                                                                                                      |
| OAuth Access Token | Check the ***OIDC Groups Rest*** box or ***OIDC Userinfo Reset*** box as per the requirement                                                                                  |

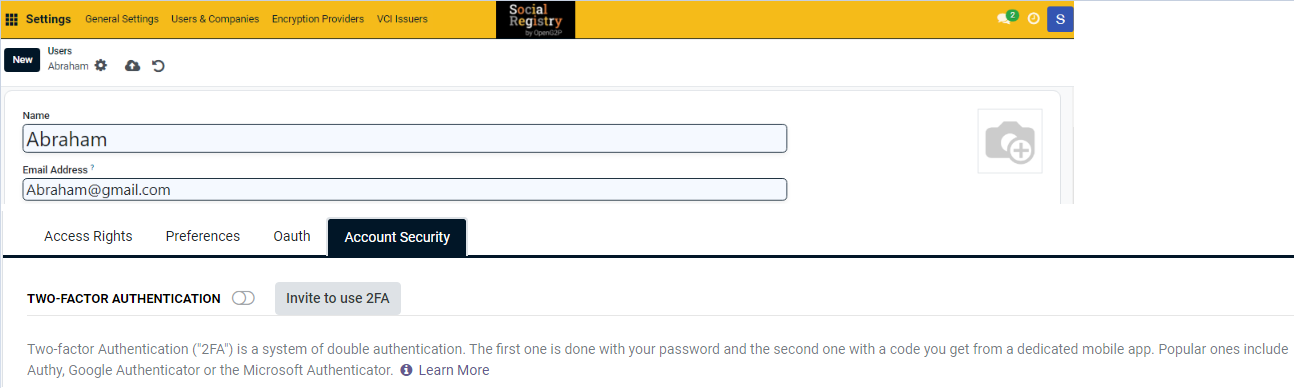
7. Click the ***Account Security*** tab.

<figure><img src="https://1895884874-files.gitbook.io/~/files/v0/b/gitbook-x-prod.appspot.com/o/spaces%2FnKdOHLbjDdIln1QDNwSx%2Fuploads%2Fgit-blob-e7ef01a08daf7194d540a61d5fdca8960028801b%2Faccount-security-tab.png?alt=media" alt=""><figcaption></figcaption></figure>

8. Click the ***Invite to use 2FA*** button to enable 2FA for a user.

| Icon                                                                                                                                                                                                                                                   | Click to                                                                                                                                                                                                                                    |
| ------------------------------------------------------------------------------------------------------------------------------------------------------------------------------------------------------------------------------------------------------ | ------------------------------------------------------------------------------------------------------------------------------------------------------------------------------------------------------------------------------------------- |
| <img src="https://1895884874-files.gitbook.io/~/files/v0/b/gitbook-x-prod.appspot.com/o/spaces%2FnKdOHLbjDdIln1QDNwSx%2Fuploads%2Fgit-blob-b6f0b2a4064d79d04550e0b271d00575206f0b10%2FActions.png?alt=media" alt="" data-size="original">              | <p>Select the appropriate value. The available values are:</p><ul><li>Archive</li><li>Duplicate</li><li>Change Password</li><li>Disable two-factor authentication</li><li>Send Password Reset Instructions</li><li>Privacy Lookup</li></ul> |
| <img src="https://1895884874-files.gitbook.io/~/files/v0/b/gitbook-x-prod.appspot.com/o/spaces%2FnKdOHLbjDdIln1QDNwSx%2Fuploads%2Fgit-blob-843f8175332ed2465f83d2585eae57031142fb1f%2Ficon-save-manually.png?alt=media" alt="" data-size="original">   | Save manually the individual data and exit from the screen.                                                                                                                                                                                 |
| <img src="https://1895884874-files.gitbook.io/~/files/v0/b/gitbook-x-prod.appspot.com/o/spaces%2FnKdOHLbjDdIln1QDNwSx%2Fuploads%2Fgit-blob-eaa9f395650b513ffba668e9638c701bce29630f%2Fdiscard-changes-icon.png?alt=media" alt="" data-size="original"> | Discard changes and exit from the screen.                                                                                                                                                                                                   |

The newly created user is added to the user list.

<figure><img src="https://1895884874-files.gitbook.io/~/files/v0/b/gitbook-x-prod.appspot.com/o/spaces%2FnKdOHLbjDdIln1QDNwSx%2Fuploads%2Fgit-blob-c9abbafb84bf5a64245ad9bb2d09bb985942cda3%2Fuser-list-sr.png?alt=media" alt=""><figcaption></figcaption></figure>

Assign user role
