# Create Program
## Description
Create Program screen helps to create a new program. This document provides step-by-step instructions to create a new program. The user with a Program Manager and Administrator role can create a new program.
## Prerequisites
The user must have a Program Manager role to create a new program.
Note:
Refer the [Create User and Assign Role](https://docs.openg2p.org/~/changes/xKUM0sBXFkyR8F24yAMq/pbms/functionality/administration/role-based-access-control/user-guides/assign-roles-to-users) guide to know how to assign role for a User.
## Procedure
## Programs
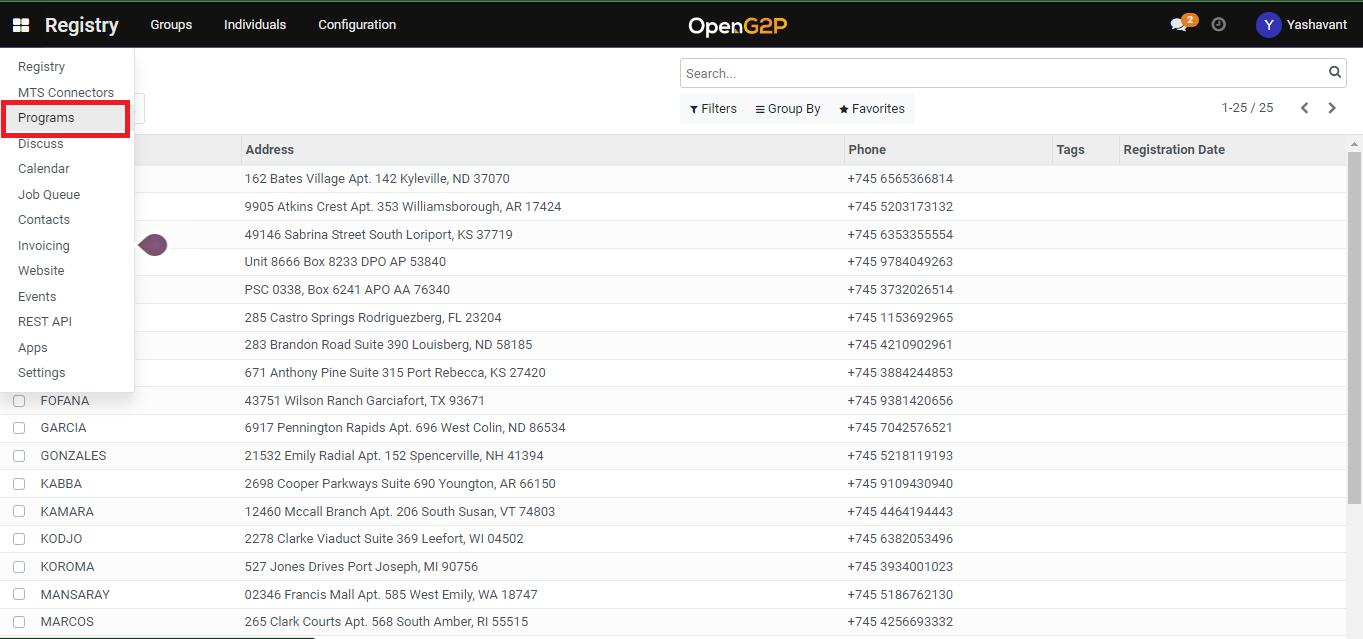
1. Click the main menu icon  and select ***Programs***.
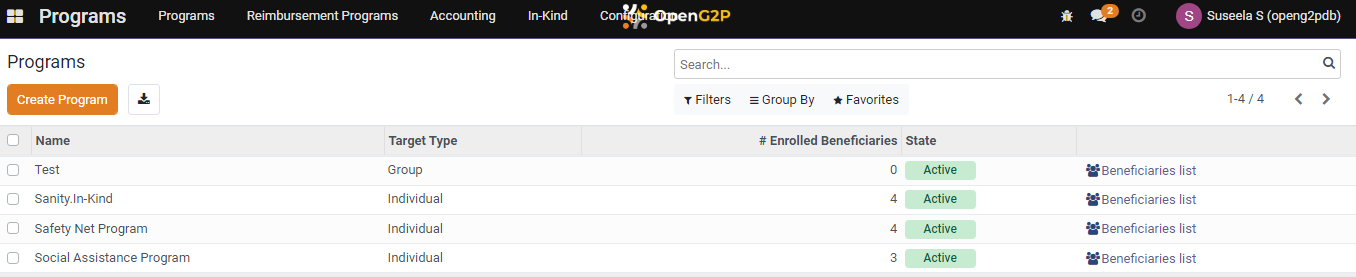
2. The ***Programs*** screen is displayed.
Choose the Programs screen
Programs screen
***Programs*** screen provides dashboard view which lists all the available Program Names, Target Type, Number of Enrolled Beneficiaries against each program, State (whether active/inactive), and the Beneficiaries list.
In ***Programs*** screen, the available features and their descriptions are:
Feature
Description
Create
Click the Create button to create new program
Click the Export All button to download the details in excel format
<
Click the Left arrow to go the previous screen
>
Click the Right arrow to go the next screen
Filters
Click the Filters link and select the appropriate options.
The valid values are:
Archived
Add Customer Filter
The advanced filter option allows you to define conditions and criteria to refine the search results.
Select the Add Customer filter and then select the appropriate option in the first drop-down to display the specific data based on the option selected.
Select the criteria in second and third drop-down to refine the search results.
Click the Apply button to display the data based on the search
Note: To enhance the search, click the Add a condition button and follows the steps given in Add Customer Filter option
Group By
Click the Group By link, select Add Custom Group and then select the appropriate options in the drop-down to display the specific data based on the option selected.
Click the Apply button to display the data based on the search
Favorites
Click the Favorites link, select Save current search and then check the appropriate options. The valid values are:
Use by default
Share with all users
Click the Save button to display the data based on the search
Search
This field is filled when the available option are selected in Filers, Group By, Favorites
### Create Program
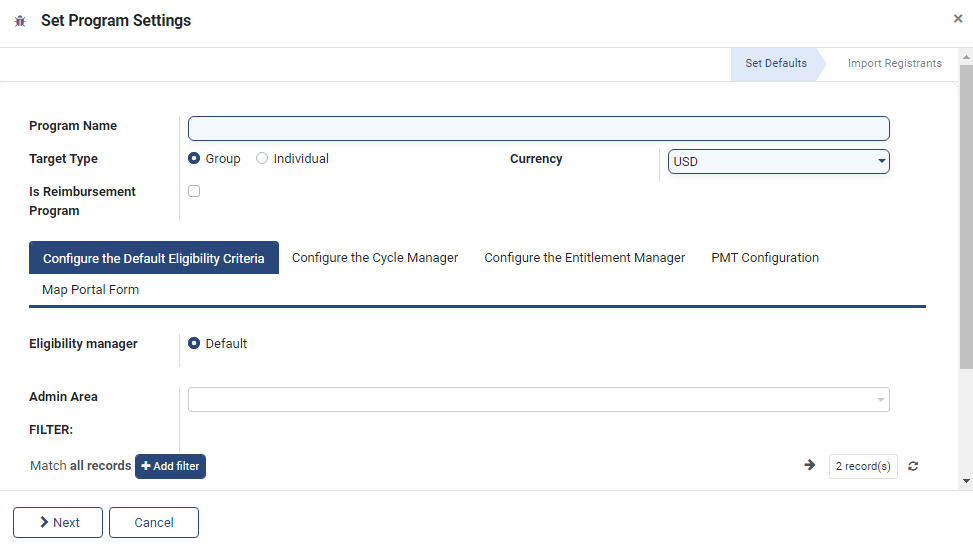
3. Click the ***Create Program*** button. The ***Set Program Settings*** screen is displayed.
Set program settings
#### Set Program Settings
In ***Set Program Settings*** screen, the features and their descriptions are:
| Feature | Description |
| ------------------------ | ------------------------------------------------------------------------------------------------------ |
| Program Name | Enter the Program name |
| Target Type |
Choose one of the Target Type. The valid values are:
Groups
Individual
|
| Currency |
Select the appropriate currency option. The valid values are:
EUR
USD
|
| Is Reimbursement Program | Check the option if the reimbursement program is required |
In ***Set Program Settings*** screen, you can find the below tabs.
* Configure the Default Eligibility Criteria
* Configure the Cycle Manager
* Configure the Entitlement Manager
* PMT Configuration
* Map Portal Form
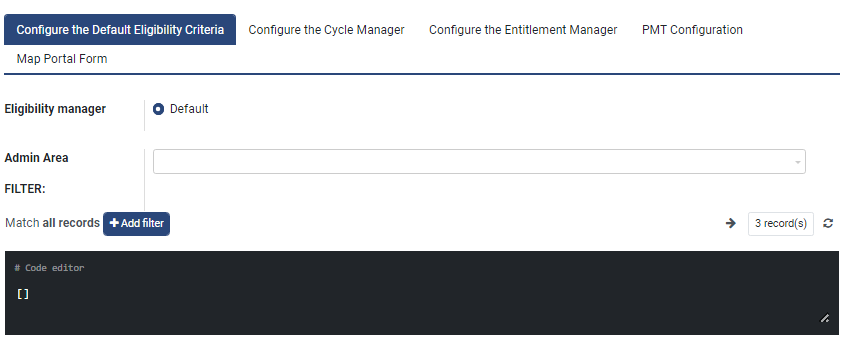
**Configure the Default Eligibility Criteria**
4. Click the ***Configure the Default Eligibility Criteria*** tab, the fields available in the tab are displayed.
Configure the Default Eligibility Criteria
Feature
Description
Eligibility manager
Default option is selected by default
Admin Area
Enter the admin area
Filter
Match all records
Retrieves the data which matches all records
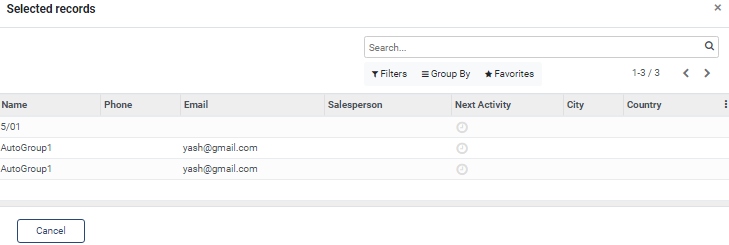
Click the Records button. The Selected records screen is displayed.
Note:
By default the list of three records are listed in the Selected records screen.
Click the Cancel button to close the Selected records screen.
Click the Refresh button to refresh the screen
Add filter
Click the Add filter button to set eligibility criteria using Domain Filters. You may set multiple eligibility criteria.
Click the Add filters button. The multiple criteria fields are displayed.
Select the multiple criteria such as ID, condition and count.
Click the x button to remove the entry in the criteria fields.
Click the + button to add new multiple criteria field.
Click the ... option to display fields in Any of section. The multiple criteria fields are displayed.
Note: You can click the ... option to add n number of Any of section
The value chosen in the multiple criteria fields are displayed in the Code editor.
In the Match records chose one of the followings:
Select All to display the data belongs to All section
Select Any to display the data belongs to Anyof section
Selected records screen
**Configure the Cycle Manager**
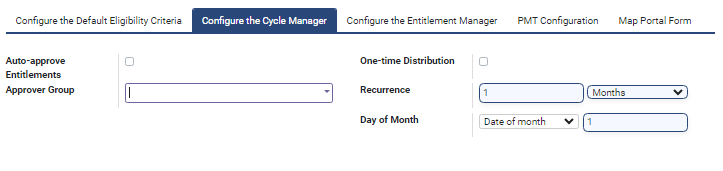
5. Click the ***Configure the Cycle Manager*** tab, the fields available in the tab are displayed.
Configure the cycle manager
Feature
Description
Auto-approve Entitlements
Check the option if the auto-approve entitlements is required.
Note:
Set entitlements via rules, without any manual approvals.
Select the parameters for entitlements. The valid values are:
Default
In-Kind
Cash
|
| ID Type to store in entitlements | Enter the ID Type to store in entitlements |
| Amount Per Cycle | Enter the amount of disbursement of a group or individual per cycle. |
| Amount Per Individual In Group | Enter the amount of disbursement per individual in a group when the program target type is "group". |
| Maximum number of individual in group |
Enter the maximum number of individuals who get disbursements per group.
Note:
It is an optional field
|
| Transfer Fee(%) |
Enter the fee incurred for disbursement as a percentage of disbursement.
Note:
It is an optional field
|
| Transfer Fee Amount |
Enter the fee incurred for disbursement as an absolute amount.
Note:
It is an optional field
|
| Entitlement Validation Group |
Enter the group name of the user who has permission to approve entitlements.
|
**PMT Configuration**
7. Click the ***PMT Configuration*** tab, the field available in the tab is displayed.
PMT Configuration
| Feature | Description |
| ---------- | ---------------------------------- |
| Enable PMT | Check the option to enable the PMT |
**Map Portal Form**
8. Click the ***Map Portal Form*** tab, the fields available in the tab are displayed.
Map portal form
| Feature | Description |
| ------------------------------------- | -------------------------------------------------------------------------- |
| Multiple Form Submission Program Form | Check the option if the multiple form submission program form is required. |
| Program Form | Enter the name of the program form |
9. Click the ***Next*** button.
10. The ***Set Program Settings*** dialog box is displayed.
11. Select the option ***Yes,*** to import the matching registrants to this program
12. Select the option ***No***, not to import the matching registrants to this program
13. Click the ***Back*** button to go previous screen
14. Click the ***Create*** button to create New Program
15. Click the ***Cancel*** button to go to the Program dashboard screen
You can view newly created Program listed in the Program dashboard screen.
Created new program listed in program dashboard screen