📔Multi-Stage Approval
Description
This guide provides steps for multiple stages of approving a beneficiary's entitlement. Each stage is assigned one entitlement manager to carry out the necessary approvals. The steps in this guide have to be carried out by each entitlement manager in the order of the stages.
Prerequisites
The user is a Program Administrator and has configured multiple stages of entitlement and assigned an entitlement manager for each stage. Learn more about creating multiple stages of entitlement here.
Steps
Navigate to Programs using the menu bar.

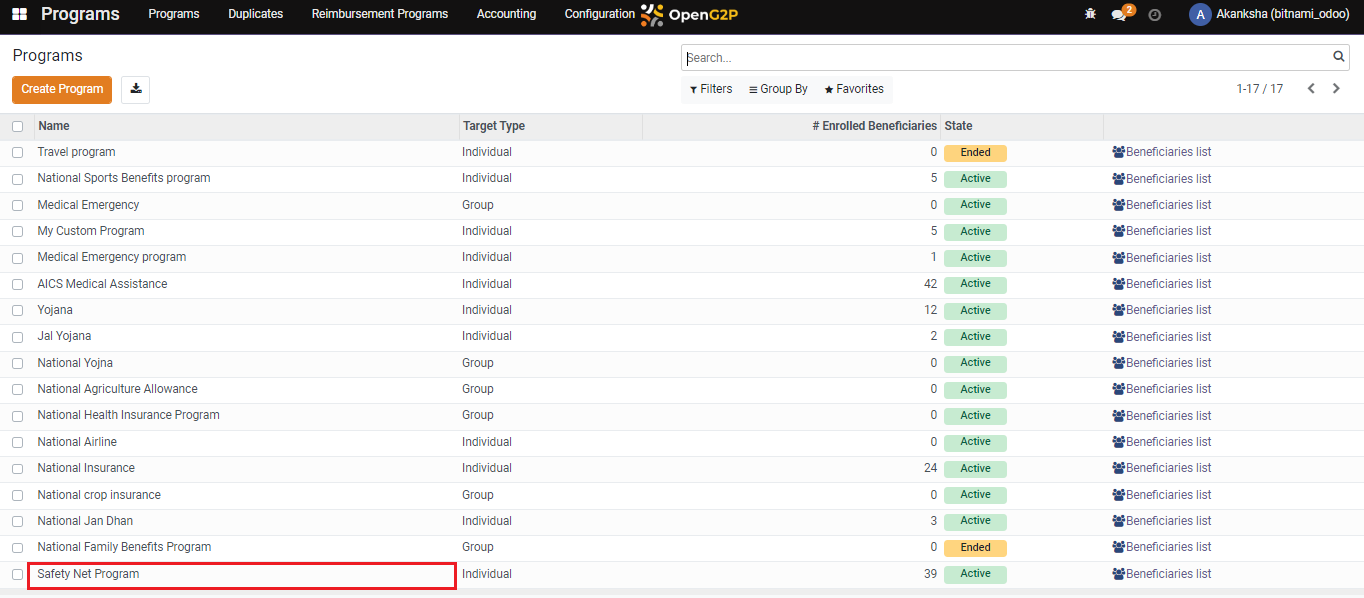
Click on the desired program.
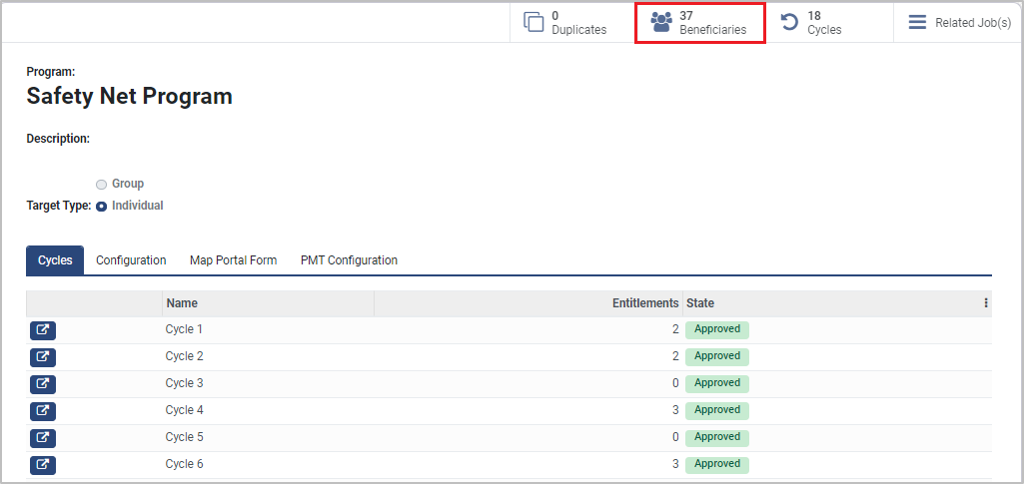
Click on the Beneficiaries. Clicking will show the list of applicants.
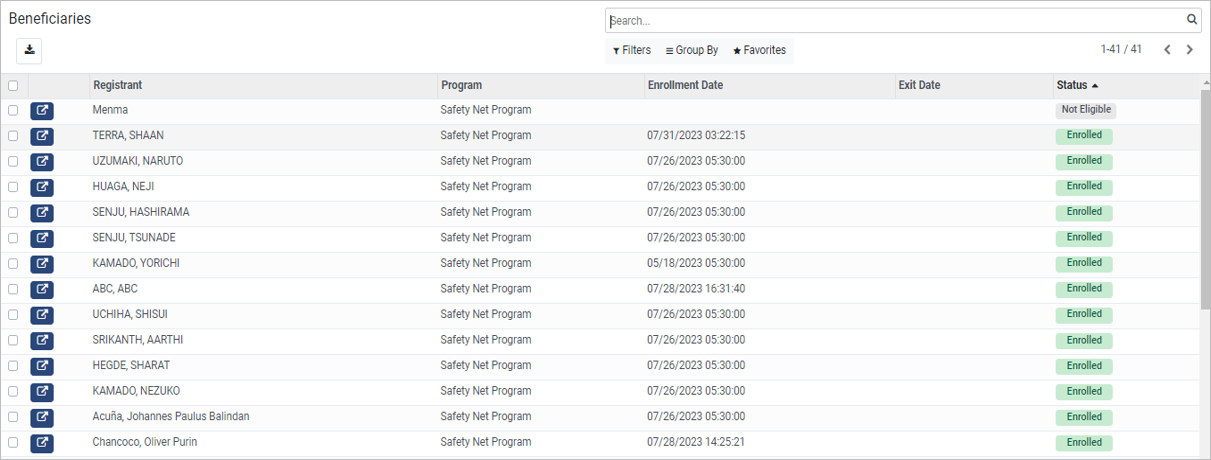
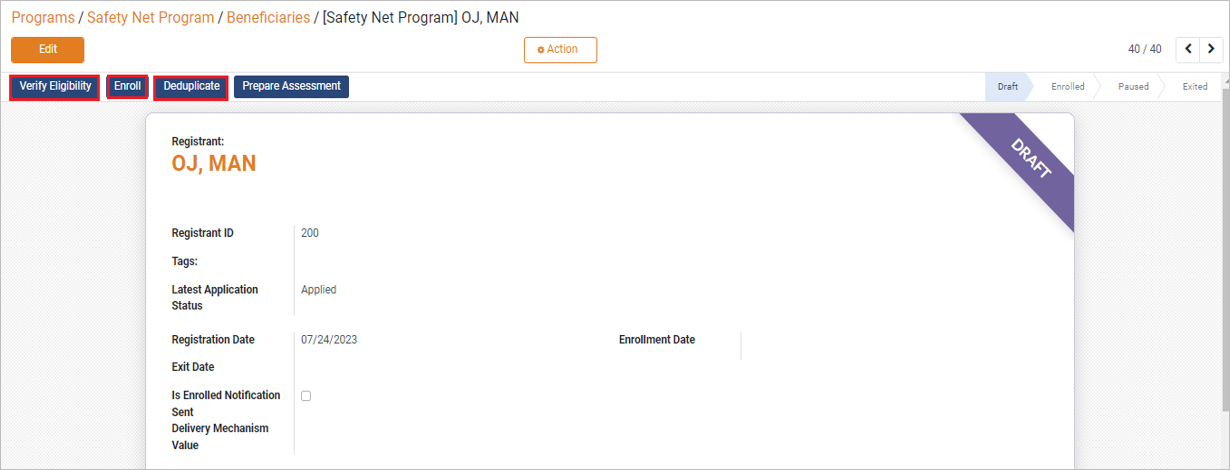
Note: Only the entitlement manager for the first stage can verify eligibility, enroll, and deduplicate the applicants. Go to the next step only if you are the entitlement manager for the first stage, or else skip the next step.
Click on Verify Eligibility, Enroll, and Deduplication. Once the applicant is enrolled the beneficiary status changes to Enrolled.
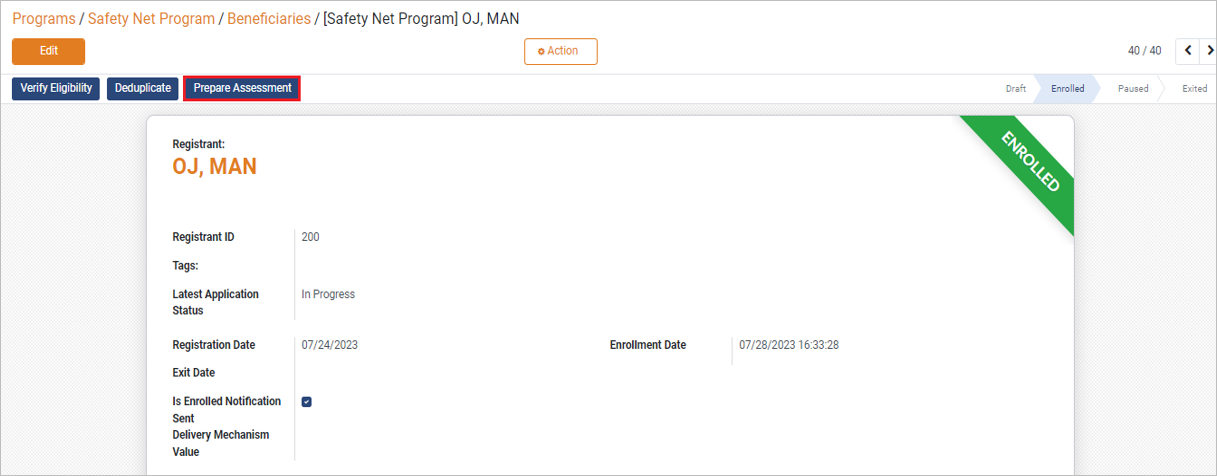
Click on Prepare Assessment.

A pop-up window appears. Click on + Add Assessment.

You can write an assessment in the new pop-up and click Save.

After creating an assessment, the Create Entitlement and Reject buttons appear. You can make a decision based on the authenticity of the application.
Authentic Application: Create an entitlement by clicking on the Create Entitlement button_._
Inauthentic Application: Reject the application by clicking on the Reject button.
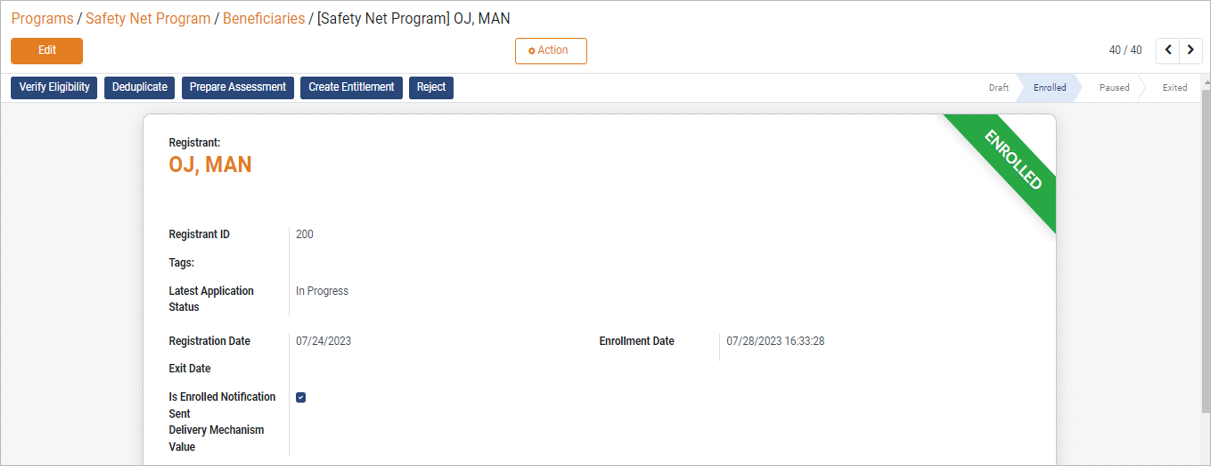
Click on Create Entitlement to fill in the required details as described here.
Service Provider: Select the service provider from the drop-down list.
Recommended Amount: Enter the recommended amount as assessed.
Cycle: The latest cycle is selected by default. You can also select the cycle from the drop-down list.
Valid From: Select the date when you want to begin the entitlement.
Valid Until: Select the date when you want to end the entitlement.
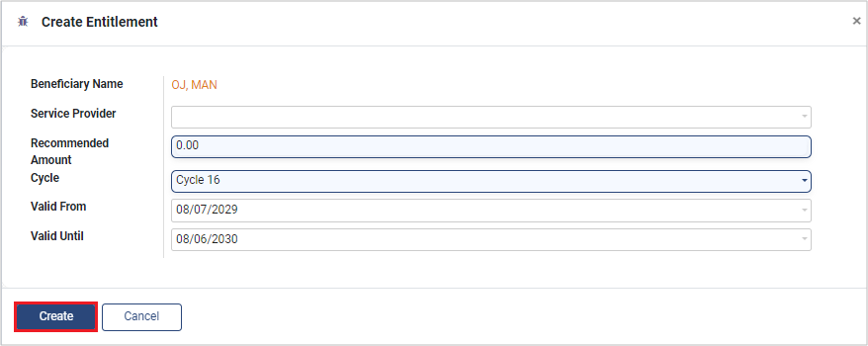
Click on Create. The entitlement will be created for the beneficiary.
Click the Entitlements, and a pop-up window appears with an Approve Entitlement button. Click on Approve Entitlement.
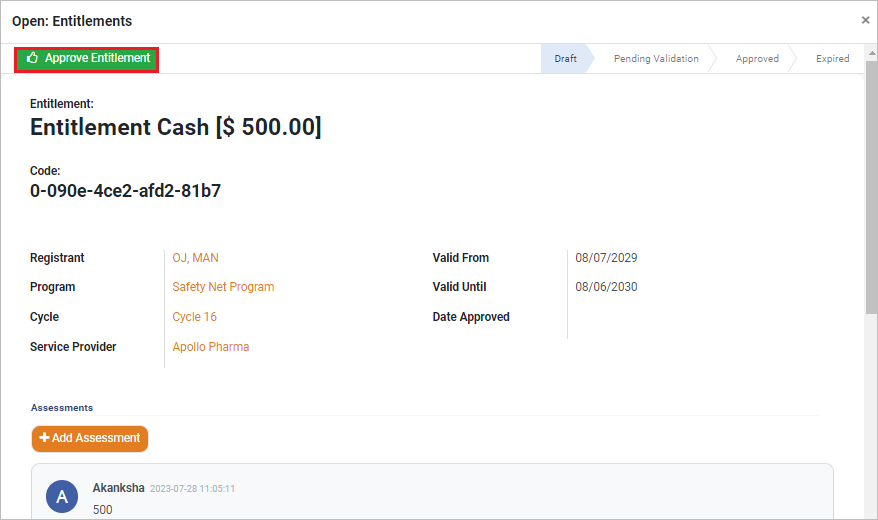
All the steps above have to be repeated by each entitlement manager configured in the Approval Settings in the Entitlement Manager. To learn more about Approval Settings, refer to the Multi-Stage Configuration guide.
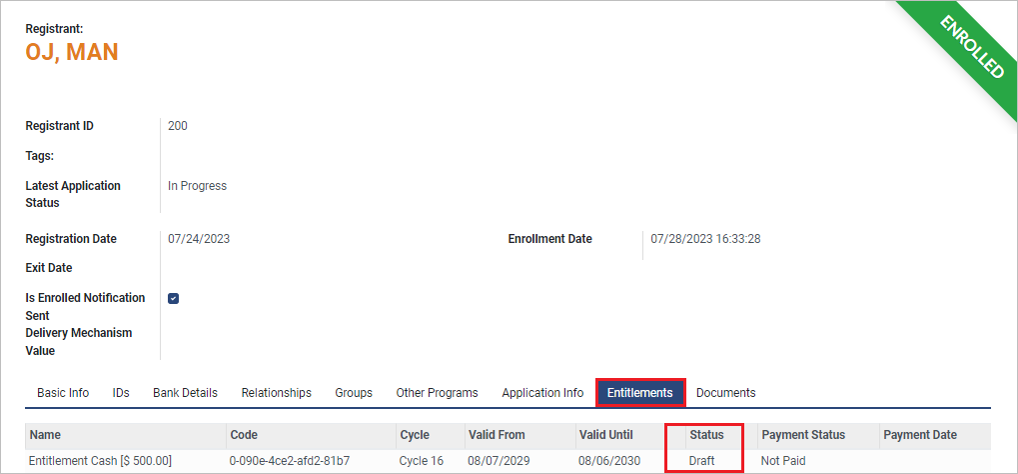
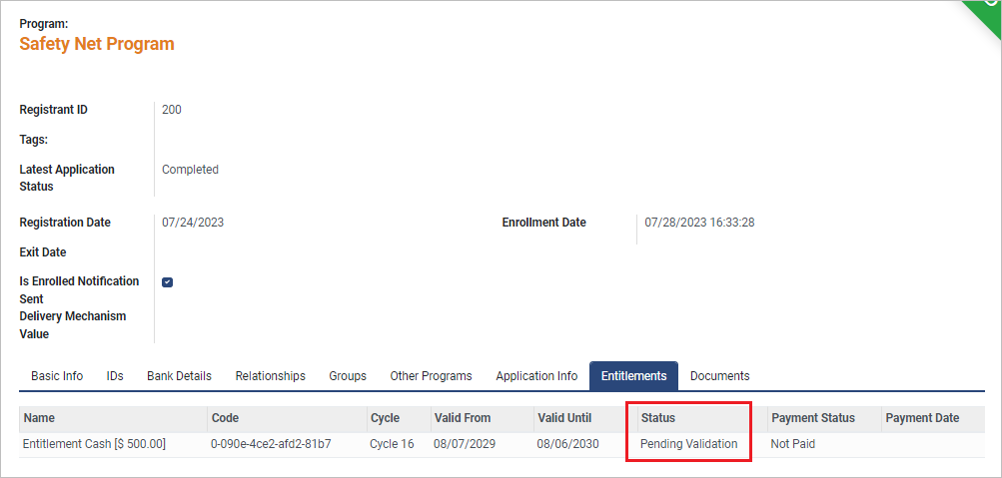
Note: The status of entitlement is set according to the approval stage.
Draft: After approval from the entitlement manager for the first stage
Pending Validation: After approval from the entitlement manager for any intermediate stage
Approved: After approval from the entitlement manager for the final stage
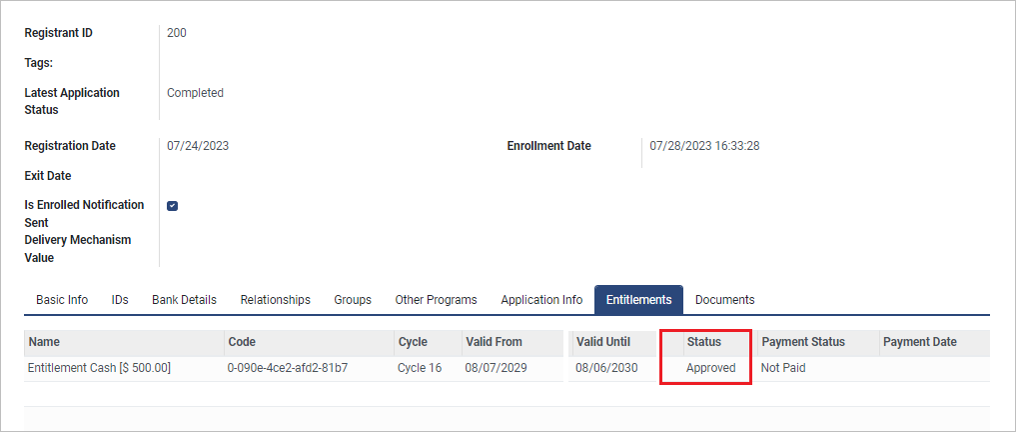
After the final approval, the action button Print Voucher will be shown to the entitlement manager at the final stage.
Last updated
Was this helpful?

